
Streaking or smearing
Water, washer fluid, salt, or road film remains in the driver's view after each pass.

Vehicle Care from Chuck Anderson Ford
Clear visibility matters in rain, snow, road spray, and glare. Replacing worn wiper blades is usually straightforward, but the correct size, connector, service position, and installation method vary by vehicle.
The metal or plastic arm can crack, chip, or deeply scratch the glass. Replace one blade at a time, protect the windshield beneath the arm with a thick folded towel or cardboard, and guide the arm down by hand.
Visibility tells the story
Blades deteriorate from sunlight, heat, freezing weather, road chemicals, dirt, insects, ice, and normal use. Replace them whenever they no longer clear the glass consistently.
Water, washer fluid, salt, or road film remains in the driver's view after each pass.
The blade hops across the windshield, vibrates, squeaks, or leaves repeated bands.
The rubber is cracked, split, hardened, rounded, torn, missing, or pulling away from the frame.
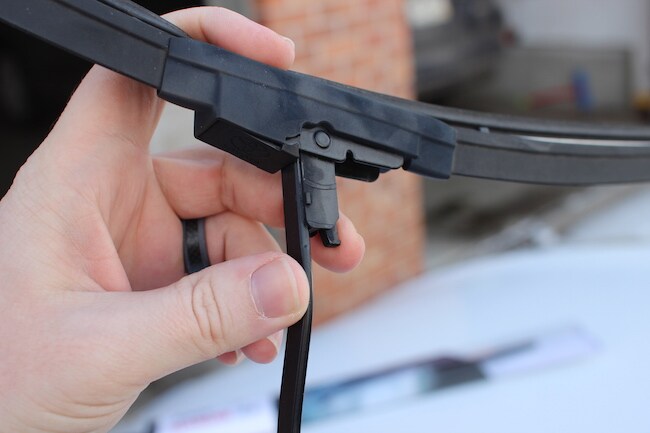
Driver and passenger blades are often different lengths, and each may use a specific orientation or adapter.
Fit matters
Do not rely only on the old blade's measured length. Vehicle applications can vary by model year, body style, windshield package, arm design, and blade position.
Important: Blade style alone does not guarantee fit. The connector, adapter, length, and pressure distribution must all be correct.
Step-by-step
The examples below are general. Your vehicle may use a J-hook, push-button, pinch-tab, side-pin, top-lock, bayonet, or another connector with a different release method.
Before removing anything, compare the replacement package with the exact vehicle application. Separate and label the driver, passenger, and rear blades when they differ. Verify that the required adapters are present and read the blade manufacturer's instructions.
Park on a level surface, shift into Park, apply the parking brake, turn the vehicle off, and keep the key or phone away from vehicles that can start automatically. Read the owner's manual to determine whether the wipers must be moved into a maintenance or service position.
Do not force a wiper arm upward when it is trapped beneath the hood edge. Forcing it can damage the arm, hood, linkage, motor, paint, or windshield.
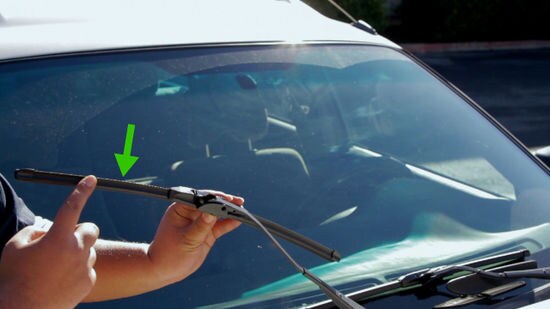
Start with either front blade but leave the other installed as a visual reference. Lift the arm only as far as the vehicle and blade instructions permit. Place a thick folded towel or piece of cardboard on the windshield directly beneath the raised arm.
Before releasing the old blade, note which direction it faces, how the adapter sits in the arm, where the locking tab is located, and which direction the blade must slide or rotate. Take a photo if helpful.
Do not bend the arm or use pliers or screwdrivers unless the official instructions specifically require a tool. Excess force usually means the release has not been operated correctly.
Hold the arm securely with one hand. Press, squeeze, lift, or slide the connector release as directed, then move the blade in the required direction until it separates. Keep control of the bare arm at all times and do not let it rest directly against the glass.
Fit the correct adapter if it is not preinstalled. Orient the new blade like the original and slide or rotate it into the arm until the locking tab fully engages. Many connectors click when locked, but visual confirmation is still necessary.
Check that the blade faces the correct direction and that no protective shipping cover remains on the rubber wiping edge.
Give the blade a gentle pull in the removal direction to confirm it is secured. It should not slide, twist free, or separate from the adapter. Remove the towel or cardboard and guide the arm slowly onto the windshield. Repeat the process on the other side.
Return the arms from service position using the exact procedure in the owner's manual. Clean the windshield, then wet it with washer fluid and operate the wipers at low speed. Confirm smooth travel, secure attachment, full glass contact, proper parking, and clearance from the hood, trim, and opposite blade.
Never test new blades on a dry, dirty, icy, or heavily contaminated windshield.
The blade should lock positively into the adapter. Give it a gentle tug before lowering the arm onto the windshield.
Rear blades can be different
Rear wipers often use shorter blades, hidden fasteners, plastic covers, integrated washer nozzles, or arms that lift only a limited distance.
Avoid unnecessary damage
Installing the driver and passenger blades on the wrong sides can cause overlap, poor coverage, or contact with trim.
A blade that appears installed but is not fully latched can detach during operation and allow the arm to strike the glass.
Dry operation can chatter, drag debris across the windshield, damage the wiping edge, and produce a misleading performance test.
Common questions
Replace them whenever visibility deteriorates or the rubber becomes damaged. Service life varies with climate, sun exposure, winter conditions, road treatments, storage, use, and blade quality. Inspect them regularly and before seasonal storms or long trips.
Some vehicles park the blades beneath the rear edge of the hood for aerodynamics. They must be moved into a service position before the arms can lift. Check the exact procedure in the owner's manual and do not force them past the hood.
Often they do not. Many vehicles use different lengths or shapes on each side. Confirm every position individually using the vehicle application information rather than buying two identical blades.
The windshield may have wax, oil, road film, silicone, insects, or other contamination. The blade may also be installed backward, use the wrong adapter, lack full contact, or be defective. Clean the glass and verify installation before assuming the blade itself is bad.
Chatter can come from a dry or contaminated windshield, incorrect blade angle, bent arm, wrong blade, loose adapter, excessive friction, damaged glass, or a worn linkage. Persistent chatter should be inspected.
Some original-equipment blade designs accept serviceable inserts, while many replacement blades are intended to be changed as complete assemblies. Use only an insert specifically approved for the blade and vehicle.
Replacing both together usually provides more even performance because they experience similar age and exposure. However, fit, size, and connector must still be confirmed separately for each side.
Yes. Operating wipers that are frozen to the glass can tear rubber, bend arms, damage the linkage, overload the motor, or blow a fuse. Clear snow and ice safely and free the blades before operating them.
The service and parts teams at Chuck Anderson Ford can identify the correct front and rear wiper blades for your vehicle, install them, inspect the arms and washer system, and help restore clear visibility.
Visit Chuck Anderson Ford Service